High-Quality File Formats: Your Key to Stunning Prints
Make Every Pixel Count!
- Upload your artwork in top-notch file formats like .EPS, .AI, and .PDF.
- These formats are the gold standard because they preserve every detail, ensuring your design looks crisp and clear, especially on compact surfaces like USB drives.
- Think of it as giving your brand the HD treatment it deserves.
Got Raster Images? No Problem!
- If vector files aren’t in your toolkit, go for high-resolution raster formats like .PNG or .TIFF.
- Aim for 300 DPI or higher to avoid any loss in quality. Remember, the clearer your image, the more it stands out.
- Avoid .JPG & .GIF if possible, but if that’s all you have, we’ll make it work. It’s all about putting your best graphic forward.

Fonts Matter
Include, Embed, Outline
- Ensure all text in your artwork uses included or embedded fonts to preserve the design.
- If embedding is not possible, outline your fonts before submitting. This converts text into graphics, ensuring your typography looks exactly as intended.
- Outlining prevents font substitution and avoids unexpected changes in font style or size.
Avoid Small Print: Keep It Bold and Beautiful
Maximize the Print Area
- Keep your text legible and your design simple.
- The less clutter, the more your logo will shine!
- Adapt your logo to best fit the space available:
For Silk Screen, Laser Engraving, Pad Print, Embossing, Extruded Lettering or Hot Stamping:
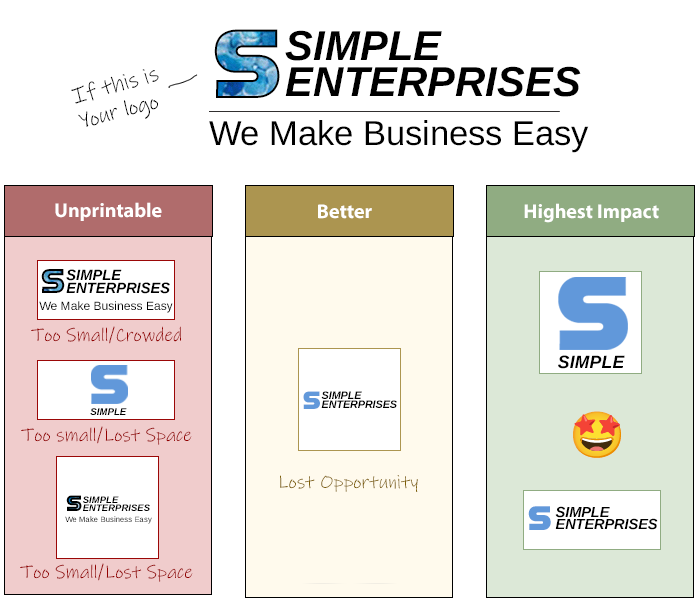
For Full Color/Direct Print, UV, Sticker Logo, Heat Transfer, Epoxy Dome & Packaging:
- Make sure that any format used has a resolution of 300DPI or greater.
- Avoid getting text too close to the edge of the print area.